June 13, 2026, 08:21:30 AM
| Chapter 6: Editing Pics | |
| About Pic Resources | |
 |
All the background images in SCI games are made up of pic resources. These
are vectored images with a width of 320 and a height of 190 pixels.
Pics contain three images (or layers might be a better way of thinking of it) in them: the visual, priority and control. |
 |
The visual image is the background picture displayed in your game. Everything that's drawn on this image will be visible to the player. |
 |
The priority image tells the interpreter which areas should be drawn in front of the views (such as ego), and which should be drawn behind them. Each colour has a corresponding number (0-15). Views, such as ego, also have a priority number. The priority of the characters in your game changes as they move up and down the screen. If the colour number in the priority picture is greater than or equal to the view's priority, it is drawn above it. This will be discussed more later on in this chapter. |
 |
The control image contains colours which are used for special events. For example, anything drawn in white on the control screen is treated as a wall which characters (such as ego) can't walk through. Colours are also used for things like doors. If the ego is on a certain colour, you could have doors open. They could also be used to indicate the ego has gone through a door, and go to the next room. Another use, would be setting a colour for water. If the ego is on a certain colour, the swimming animation will be activated. The uses of the control image are endless. |
| Getting Started | |
 |
In the Game Explorer, there's a list of the game's resources. Click on the pic folder and the list of pic resources will appear on the right, along with a preview of the first pic. |
 |
Double click the first resource (named "rm001 Background") and the picture editor will open up. rm001 Background is the background for the first room, named rm001. The Picture Editor will load up with the pic you selected. |
| The Picture Editor | |
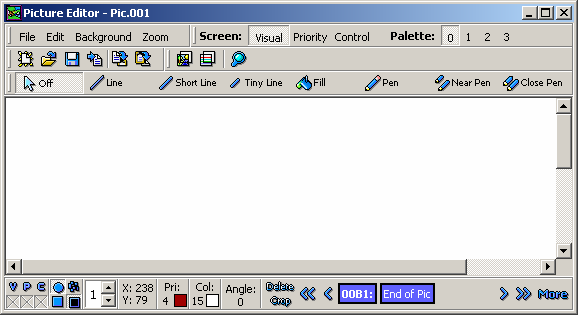
SCI pictures are stored in a vectored format. This means that rather than being stored as an array of pixel colours, they are stored in steps. For example, the interpreter parses the picture and is told by it to "set the visual colour to blue", then "draw a line from 20,44 to 99,120". This generally saves a lot of space when storing the pictures. This being said, you must draw your pictures in steps. It's not really any harder than drawing other types of graphics, but you lose the ability to copy and paste. You can however, paste a tracing image. This will be discussed more later. | |
| Making The Picture | |
We'll begin by drawing the room's perimeter. Before drawing anything, we must select the colour to draw with. There are three buttons in the bottom left corner of the window. These are used to select the colour to draw with, as well as turn off drawing. If a colour is selected for any of the three images, then anything drawn will be drawn on that screen. If the colour is turned off, nothing will be drawn on that image. This means that if you have colours selected for all three images, anything you draw will be drawn on all of them. This saves a lot of time when doing priority and control lines.
 |
Click on the "V" button to select the visual colour to draw with. The colour selection window will pop up. |
 |
The colour selection window allows you to do more than just select colours. You can use it to change the palette. Though these are 16 colour EGA games, SCI supports the use of colour dithering. Each entry in the palette is a set of two colours. When drawing with a colour in the palette, each of it's colours is drawn on every other pixel. To change a colour, simply select it, and then on the right of the window, select it's first and second colour with the mini palette. You'll also notice that there are four palettes to choose from. Your picture can be drawn with any of the four palettes. These are commonly used to have day/night sequences in a game. For example, you could set the first palette to a light colours and the second palette to dark colours. Then, in your script, you can specify whether it's day or night. If it's day, it will display the picture with it's light colours. If it's night, it will display it with it's dark colours. The "Write Entire Palette" and "Write New Colour(s)" options are checked if you change a palette. This specifies whether the entire palette should be written to the picture file, or just the colours which have been changed. Now, select a colour for the room's perimeter and click "Set Colour". It will go back to the picture editor. Notice that below the "V" button is the colour you selected. |
 |
Since this is the room's perimeter, we will want to set up control lines to simulate walls. If the characters hit these, they will stop moving (ie. bump into the wall). To select the control colour, click on the "C" button. |
 |
The control colour selection window will pop up. From here, you can select which colour to draw with on the control image. Since we want it to create a barrier, we will use the highest colour, colour #15 (white). Select it and click "Set Colour". |
Now that we have our colours selected, we can begin drawing.
 |
Because I want to draw lines, and they may be longer than 127 pixels, I'm going to select the "Line" tool. Choosing a line type appropriate to your task make it easier, and the file size smaller. Click the "Line" button on the toolbar. |
 |
When drawing, look at the X and Y coordinates on the bottom toolbar. They will help you draw your picture proportionately. |
Now that the tool is selected, we can begin drawing. Zoom In to make it easier to see what you are drawing.
We are going to make a room that is 320 pixels wide at the bottom of the screen, and 240 pixels wide at 100 pixels down.
To use the line tool, left click on it's points, then right click to stop drawing.
 |
Draw a line from the bottom left corner (0,189) to (60,100), then another to (180,100). This will leave a space for the door. Now draw a line from (210,100) to (260,100), then another to the bottom right corner (319,189). |
If you make a mistake, don't worry! It's easy to undo it.
On the bottom right of the picture editor is the picture stepper. It allows you to step through the picture from beginning to end, inserting and deleting parts of your picture.
- The "00C9" is the current position we are at in the picture.
- The "End of Pic" is the code stating that the current position is the end of the picture (more on this coming up).
- The "<" button allows you to step back one step.
- The ">" button allows you to step forward one step.
- The "<<" button allows you to step back to the beginning of the picture.
- The ">>" button allows you to step forward to the end of the picture.
- The "Delete" button deletes the step at the current position.
- The "Crop" button deletes all steps done in the picture after the current position.
- Clicking the "More" button will bring up a window giving you greater control over the selecting the position and deleting steps.
If you click on the "<" button, you will see that you are back where you were before you drew the last line. You will also notice that the picture stepper has been updated. It shows that you are now at position 00BF, and the step at the current offset is a "Line".

If you clicked "Delete", it would delete that line. If you clicked ">", it would go back to the end of the picture. Finally, if you started drawing, it would insert the new steps between the first and second lines.
Play around with it. It's quite easy to understand and very useful.
Now, back to drawing the room...


We now have the room's main boundary control setup, so we will turn off the control drawing. Click on the "C" button, then click "Turn Off".
 |
Next, we will draw some lines for the walls. Draw a line from (60,100) to (60,0). Then, draw another one from (260,100) to (260,0). |
Note that if you hold down the shift key the lines will automatically stick to the nearest compass direction (ie, North, North West, etc., every 45 degrees), so you can easily draw straight or diagonal lines!
 |
Next, we will draw some lines for the door frame. Draw a line from (180,100) to (180,50), then over to (210,50), then back down to (210,100). |
Now that we have that set up, we will go back to the control screen to add the door controls.
The default doorCtrl is colour #1 (navy blue), roomCtrl is colour #2 (green), and doorBlock colour is #14 (yellow). These colours can be changed in your scripts, and will be explained in Chapter 21: "Creating and Using Doors". Until then, you just need to know what these three colours mean.
- doorCtrl specifies the colour which is used to determine if ego is near the door. If ego is on the doorCtrl and the player types "open door", it will open the door. Otherwise, it will tell the user that they aren't close enough.
- If ego is on the roomCtrl colour, it considers that the ego has walked through the door, so it will go to the next room.
- doorBlock specifies the door boundary. If the door is closed, this is treated like the white boundary control. If the door is open, it is ignored and the ego can walk past it.
 |
Now that you know about door controls, let's continue. Go to the control image by clicking on the image selection drop down and choosing "Control". Now you will be able to see the control screen. |
Since we only want to draw on the control screen, we will disable the visual draw and set the control colour. Click on the "V" button, then click "Turn off". Next, click the "C" button, and choose colour #14 for the doorBlock.
 |
Select the "Short Line" tool. You could use the normal "Line" tool, but since we want to draw shorter lines, it will make them easier to do. It will also create a more compact and efficient picture file. Next, Draw a line from (181,100) across to (209,100) then up to (209,97), then back to (181,97), then down to (181,100). This will give us the boundary rectangle for the doorBlock. |
 |
Next, we will fill the doorBlock. Click the "Fill" button, then click anywhere in the bounds of the doorBlock rect (ie. (195,98)). |
 |
We now have the first door control done. |
We will continue by drawing the roomCtrl control. Click the "C" button, and choose colour #2 then select the "Short Line" tool again. Next, Draw a line from (175,99) up to (175,90) then across to (215,90), then back down to (215,99). This will give us the boundary rectangle for the roomCtrl. Click the "Fill" button, then click anywhere in the bounds of the roomCtrl rect (ie. (199,94)).
We will finish the door controls with the doorCtrl control. Click the "C" button, and choose colour #1 then select the "Short Line" tool again. Next, Draw a line from (170,101) down to (170,120) then across to (220,120), then back up to (220,101). This will give us the boundary rectangle for the doorCtrl. Click the "Fill" button, then click anywhere in the bounds of the doorCtrl rect (ie. (195,110)).
 |
The door controls are now set up. They won't do anything until the door is set up in the script, which will be done in Chapter 21. |
Now we will go back to the drawing the visual image by clicking on the image selection drop down and choosing "Visual".
To finish outlining the room's floor, we will draw a line in the doorway. Turn off control drawing and select teal as your visual colour (the fourth colour in the first row, between dark green and dark red). Select "Short Line" and draw a line from (181,90) to (209,90).
|
Now we will draw the box to demonstrate priorities. Select black as your visual colour, and colour #13 as your priority colour. Colour #13 is chosen because at the box's bottom coordinates, ego will have a priority of 13. Any priority of greater than or equal to value as ego's control will be drawn in front it. Moving the cursor, you can see ego's priority and the current coordinates on the bottom toolbar. It also shows the number of the colour the mouse is over. |
Draw a line from (80,169) over to (110,169), then up to (120,159), then up to (120,130), then back to (89,130), then down to (80,139), then back down to (80,168). Continue by drawing another line from (80,139) over to (110,139), then down to (110,169). Finally, draw a line from (110,140) to (120,130).
Now we can fill the picture in. Select blue as the visual colour and fill in the front of the box (ie. (94,151)). Select navy blue as the visual colour and fill in the side of the box (ie. (117,150)). Select cyan as the visual colour and fill in the top of the box (ie. (103,133)).
Now that the box is finished, we will turn off the priority draw. We don't want anything else to be prioritized.
We can finish filling in the picture. Select the "Fill" tool, then select teal as the visual colour and fill in the floor (ie. (200,120)). Select dark gray as the visual colour and fill in the area behind the door (ie. (202,72)). Select green as the visual colour and fill in the front of the wall (ie. (160,60)). Select dark green as the visual colour and fill in the sides of the wall (ie. (30,70) and (290,70)).
Now all you need to do is draw the boundary control for the box. Turn off visual draw and go to the control image. Next, select colour #15 as your control colour. Finally, draw a line from (80,169) to (110,169), then up to (120,159), then back to (90,159) and back down to (80,169).
Now your picture is done!

| Visual |
|
| Priority | 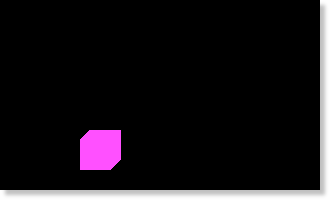 |
| Control | 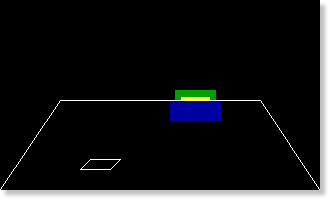 |

It seems like a lot of steps, but it's really not many. When you are drawing your own pictures, it's very quick. It's especially quick if you are tracing an image.
 |
Click the save button, and the "Add Resource" window
will pop up. As discussed in chapter 3, you just need to click "OK".
Now that the you've finished editing the pic and saved it, you can close the Picture Editor. |
|||
 |
Back in the GameExplorer, you will see that the picture has been updated with your changes. Click on the Run button in the main window's toolbar to play the game with your updated pic. As soon as you enter the first room, you will see the picture! |
|||
| Congratulations! You now know how to edit pic resources. | ||||
| ||||